4.350,00 €Precio base-450,00 €4.800,00 €Precio


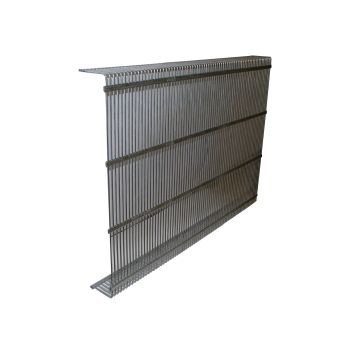
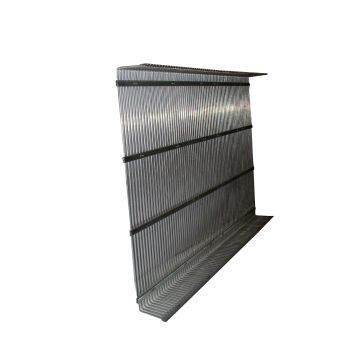
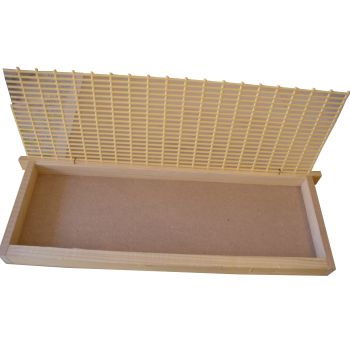
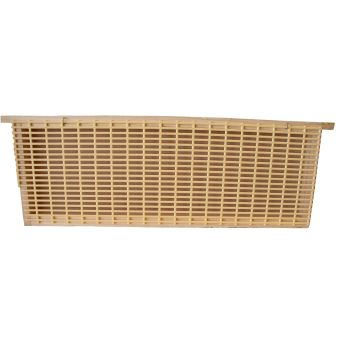
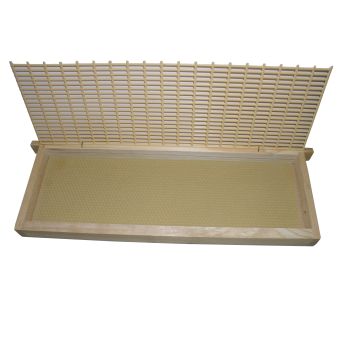
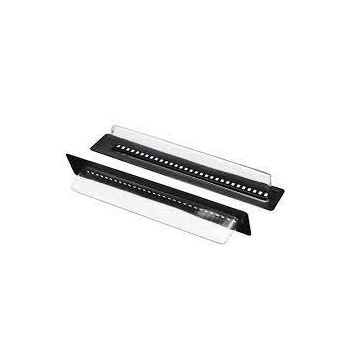
"GB CAGE" Isolator for BLOCKING COVEN in galvanized steel with queen excluder grid Completely insulates the frame from nest , and can be inserted in any place of the Beehive nest EASY APPLICATION , consisting of : No. 2 symmetrical shells + No. 2 hooks for closure Size: L=44.2 H=31.2 SP.=4.6 cm See DISCOUNT QUANTITY
It is made up of two symmetrical galvanized sheet metal shells, plus two hooks that make for an excellent and very simple locking system Removal is quick and easy because even in the presence of crop the bees do not build inside it Maintenance and cleaning is minimal It can be sterilized by direct flame It is very easy to handle in storage given its sturdy characteristics Its footprint is that of a nest frame It can be used with 10 combs, so there is no need to make space in the nest by removing a frame. Uses and applications It was created to have multiple utilities, in detail: Counteracting varroa by brood blocking Controlling hive development in spring Use in queen rearing Brood blocking to increase productions (swarm effect simulation) Swarming management 1 - Brood blocking to counteract varroa Search for the queen and cage her using a mixed brood honeycomb. Often the one the queen is on is fine. Wait 19 to 21 days max and then carry out removal. In case of orphanhood (1/2%) insert a fertile queen at the time of release (19th/21st day).Remove removed honeycomb. Meanwhile, while waiting for treatment, remove Honey super if present. On day 24/25, after brood check (to check for eggs) intervene with oxalic acid. It is quite rare to find cases of orphanhood, but to avoid going down unnecessary roads, bring along some fertile queens (for the scrupulous beekeeper this advice may be superfluous). What not to do when caging the queen? Use bank combs with honey and pollen Use wax sheets Use combs already built in stock. Why not bank frames? Because you would not have enough space for laying since they are often filled with honey and pollen. Why not the wax sheet? Because if there were a nectar famine, it would not be well constructed or laid. Why not already constructed honeycombs? Because in this case after 10 to 12 days it would be completely laid and operculated, and would no longer perform its function as a trap honeycomb. Remember that total functionality of the GB cage occurs only when even minimal queen laying is always possible. It is essential that it remains brood receptive to varroa. The use of a honeycomb with mixed brood will allow this situation to be maintained throughout the duration of caging. From the tests conducted, it has been seen that the amount of varroa trapped in the honeycomb is truly remarkable, often reaching percentages of more than 70/80% of the total amount present in the Beehive. One of the prerogatives of the "GB Cage," is not having to wait 24 days to carry out the first useful treatment to lower the varroa infestation. Already after a few days, the honeycomb starts "working" by attracting most varroa to itself, trapping it under the operculum. In this way, adult bees are better preserved from the stings of circulating varroa, a problem that in heavily infested Beehives creates considerable, often irreversible, damage. The second but no less important quality is the preservation of the queen. Upon release it can be seen that she often resumes laying immediately on the first honeycomb she comes across favoring a quick restart the Beehive. Acceptance of queens is almost immediate and total. In a few cases 1 or 2% queens were replaced by real cells, but this was due to physical factors (seniority or various deficiencies). 2/5 - Spring Development / Swarming Management Use the "GB Cage" in cases where early spring development is expected.Blocking the queen for a week can control laying, delaying swarming by about 10 days. By using an already constructed brood honeycomb, you do not lose much in terms of laying and can leave it caged for up to 10 gg. When you release the queen, you will have a compact, well-maintained brood honeycomb. Once she is released she will have plenty of empty space available and the many bees that have hatched in the meantime will better care for the new brood. In this way we can avoid nest congestion, reducing tiring visits to check the swarming. It will then be up to the beekeeper himself, depending on the areas in which he operates, to decide the timing and duration of the intervention. 3 - Queen breeding Using the "GB Cage" one can breed queens without orphaning families. Those who produce thousands of queens will certainly use other methods, clearly we are addressing those who primarily produce honey and do not want to give up producing a few hundred queens for their own use. Use a brood honeycomb already built but without brood Introduce it into the cage together with the queen mother Arrange the honeycomb in the center of the Beehive After 3 / 4 days release the queen. We will then have hundreds of larvae of the same age to carry out the translocation. The advantage of this system will be that there will be no early births on the "grafted splint," a factor that often negates the work of the less experienced breeder. Before translarvation is carried out, the most populated families are identified where the cues with domes will be grafted. Caging of the queens and preparation of the space to house the cue will be done. The cage with the queen should be placed as the first honeycomb on the right. The cue with the domes should be placed as the third on the left, between two combs of nascent brood. If necessary, proceed with feeding. After 10 days, once the fertilization nuclei have been prepared, we take the cells and insert them into the nuclei. The queen should be released immediately; however, it is also possible to release her the next day. The advantage of not having the orphaned hive gives us the opportunity to manage it as a full-fledged production Beehive. 4 - Blocking brood to increase production It is well known that to raise a bee requires nectar. Few people know that it takes 2 to 3 kg. of honey per honeycomb to feed a full brood cycle. When we consider that typically in May at the beginning of acacia flowering you have families with 7 to 8 honeycombs of brood, the math is immediately done. About 15 kg. of honey will be used to feed the brood, and it will certainly not be stored in the Honey super. Using the cage about 10 days before harvest and for a duration of 8 to 10 days, we will arrive at flowering with all the brood operculated and very little brood to feed. The bees for several days will have as their only job to collect and store nectar. The timing may be different depending on the bloom used and the type of conduction you want to do next. In any case if done judiciously, this method has as its foundation to simulate the swarm effect as much as possible. We are well aware of the potential for harvesting a swarm during a bloom. From experiences made on acacia production, 15 to 20 percent higher production is possible.
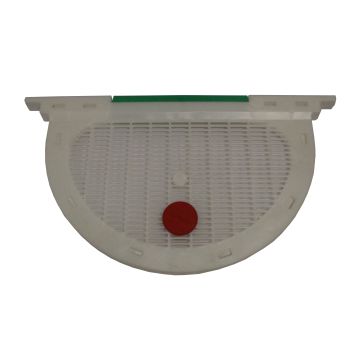
Varroa i fights them more effectively by zeroing out the winter brood. From this observation comes the Menna cage, designed and patented by Vincenzo Menna: a practical device that promotes the queen's rest in the colder months, and that brings all the varroa present in the Beehive more easily out into the open. The period of use varies from northern to southern Italy, but indicatively the first days of November will be the most suitable to start caging, and mid to late January those for caging. Considering that a regular family goes into production in 60 to 70 days from the release of the queen, it will be up to the beekeeper to adjust the period.
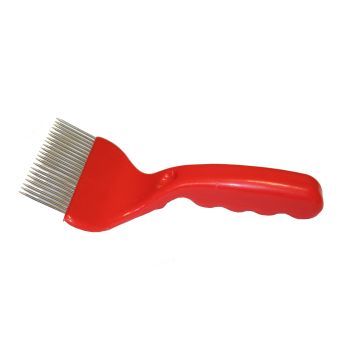
Cepillo grande con cerdas de crin de alta calidad para retirar las abejas del panal
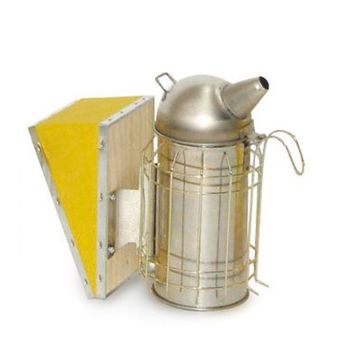
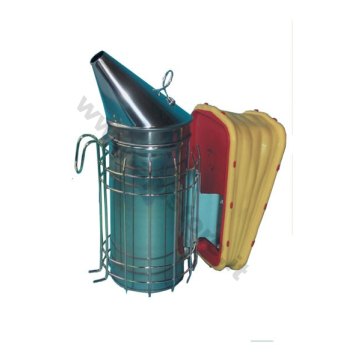
Ahumador de acero inoxidable con un diámetro de 10 cm. Manta de cuero de vinilo y madera desmontable con tornillos de fijación. Red antiquemaduras de acero inoxidable fácilmente desmontable.
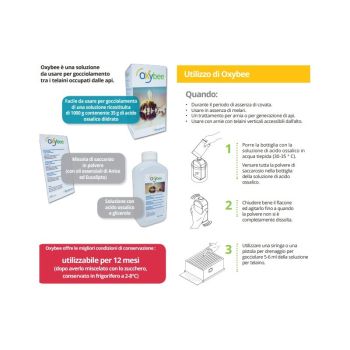
WHEN TO USE-During the broodless period-one treatment per Beehive or per generation of bees. Use in the absence of Honey super. Use with Beehives with vertical frames accessible from above. HOW TO USE -> SEE ATTACHMENT TO DOWNLOAD ADVANTAGES - Glycerol prolongs the shelf life of the oxalic acid solution, thus its distribution in the hive - Oxybee is the first oxalic acid product with glycerol and essential oils available in Italy - Average efficacy >98% - Product approved for organic beekeeping
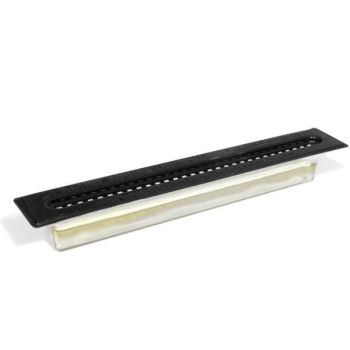
Funda de goma de silicona (también disponible como pieza de recambio código QI M34), reforzada con nervaduras y adaptable a cualquier tipo de ahumador.
Red de protección antiquemaduras extraíbleAlmohadas de nylon resistentes al calor y reforzadas con fibra de vidrioVálvula de succión de silicona
Almohada trasera, pretaladrada para atornillar el cuerpo al ahumador - adaptable a cualquier modelo.
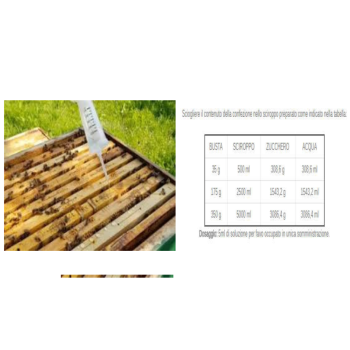
Guaranteed safety for consumers, bees, and Beehive products;Exact dosage for precise number of hives;Allowed in organic beekeeping;Easily soluble in sugar syrup at room temperature;Excellent efficacy (>96%) and tolerability.
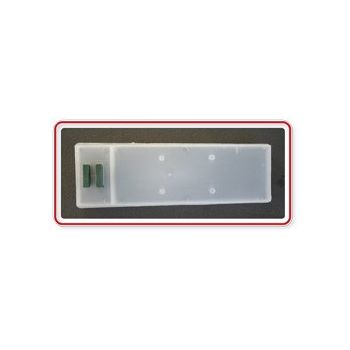
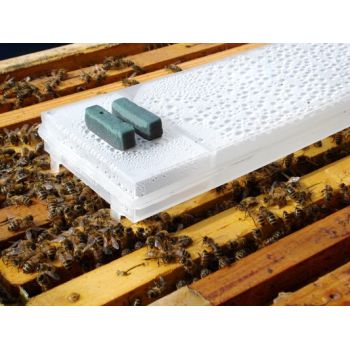
Cómo realizar el tratamiento 1) Limpie los cuadros centrales de residuos de cera y propóleos, donde se colocará el evaporador.2) Ponga la Colmena "en burbuja". 3) El evaporador "BioLetalVarroa fórmico" dispensa una cantidad muy pequeña de ácido fórmico (de liberación continua), suficiente para romper gradualmente la Varroa naciente, y no; por lo que es aconsejable realizar un tratamiento con ácido oxálico sublimado (se recomienda el sublimador BioLetalVarroa), para romper la máxima cantidad de Varroa fuera de la cría y continuar, 3-4 días después, con el tratamiento utilizando "BioLetalVarroa fórmico".4) Llenar el dosificador con la cantidad necesaria para un único tratamiento de 25 días, es decir, aproximadamente 360 g de ácido fórmico al 85%, a través de los dos orificios previstos para alojar las esponjas, colocándolo verticalmente y, a continuación, cerrarlo con los dos tapones previstos en el envase hasta su colocación en la Colmena.55.) Cuando compruebe la gota de Varroa, se recomienda no limpiar la bandeja de Varroa con un cepillo, sino trabajar con un recogedor o posiblemente usar una máscara protectora, para evitar inhalar cualquier residuo de ácido oxálico.6) Coloque el dispensador encima de los marcos en el centro de la familia, retirando las tapas de los extremos e introduciendo las dos esponjas en los orificios previstos, encajándolas verticalmente hasta que toquen el fondo.7) Cierre la colmena con la tapa invertida si está equipada con un marco de 55 mm. En caso contrario, añada un marco del mismo tamaño y cierre la colmena normalmente8) Para funcionar en condiciones óptimas, la Colmena debe protegerse con un aislante (se recomienda poliestireno s20-25mm) para evitar el sobrecalentamiento inducido por el sol, permitiendo así que el evaporador funcione exclusivamente a la temperatura natural de la familia de las abejas. 9) Para el tratamiento de los núcleos, el procedimiento es el mismo que para las colmenas. Sin embargo, se recomienda cerrar uno de los dos orificios con el tapón, introduciendo sólo una esponja de evaporación en el segundo orificio.10) Si las condiciones climáticas inducen un sobrecalentamiento excesivo, que no puede reducirse con el aislamiento, se recomienda acortar la altura de las esponjas, comprobando que la evaporación diaria no supera los 14-18 g.11) Una vez finalizado el tratamiento, se puede vaciar el recipiente del ácido residual, que puede reutilizarse para otros tratamientos.
"GB CAGE" Isolator for BLOCKING COVEN in galvanized steel with queen excluder grid Completely insulates the frame from nest , and can be inserted in any place of the Beehive nest EASY APPLICATION , consisting of : No. 2 symmetrical shells + No. 2 hooks for closure Size: L=44.2 H=31.2 SP.=4.6 cm See DISCOUNT QUANTITY